When faced with challenging tasks like complex electrical work, emergency plumbing, or septic tank maintenance, it’s understandable why many people prefer to hire professional help. However, it’s equally important for individuals to have a basic understanding of do-it-yourself repairs or handyman skills, even if they reside in an apartment or condominium.
In the past, it was common for men to inherit fundamental carpentry, plumbing, electrical, and maintenance skills from their fathers as a natural part of their upbringing. However, if you missed out on these valuable lessons, fret not! Here’s an essential list of handyman skills that every man should possess to reign as the ruler of his personal domain:
Utilize studfinders
Studfinders, often the subject of countless comedic quips, may not break the bank, but why rely on a gadget when you possess the ability to locate studs on your own? Studs serve as vertical beams that offer vital support to walls, making them essential for securely mounting decorations, TV screens, or anchoring heavy furniture. Generally, you can expect to find a stud on each side of a window and adjacent to electrical boxes housing switches and outlets.
Handle loose tiles
Addressing loose or unstable tiles promptly is crucial, as they can serve as precursors to more severe tile damage. Fortunately, this minor issue can be rectified before it escalates. To start, heat up an iron and gently glide it over the loose tile and the adjacent area. This will effectively loosen the adhesive that holds the tile in place. Gently lift the tile out once it becomes more pliable. Next, thoroughly clean the underlying area with alcohol, ensuring all remnants of the old adhesive are removed using a putty knife.
Add a new layer of tile adhesive to both the gap and the rear of the tile, ensuring full coverage. Then, meticulously realign the tile, placing it back in its original position. Utilize a rolling pin to firmly press the tile down and eliminate any trapped air bubbles. Finally, wipe away any excess adhesive on or around the tile. If the loose tile is on the floor, consider placing a weighty object such as a stack of books on top of it until the adhesive fully sets, ensuring a secure bond.
Learn how to caulk
If you happen to observe any slight leakage around your sink, shower, or bathtub, it may indicate that it’s time to consider resealing the caulking. Caulking is the putty or gel-like material that fills the gap between the basin and the wall or floor. Over time, caulking loses its effectiveness, so it’s recommended to reseal it annually.
To get started, procure a plastic putty knife and meticulously extract the existing caulking by gently scraping it away. Once that’s done, clean the surface using rubbing alcohol. To achieve a precise and polished result, affix a strip of masking tape slightly above and below the targeted area where you intend to apply the fresh caulk. This technique will aid in creating a smooth and uniform line. Now, select a tube of caulk that suits your needs. Silicone-based caulk is ideal as it provides better protection against mildew. Load the caulk into a caulking gun according to the package instructions. Before proceeding, ensure that you cut open the application tip of the caulk tube and pierce through any additional layers of packaging inside.
As you proceed, glide the caulking gun along the targeted seam that requires patching, ensuring a smooth and consistent application as you evenly depress the trigger. After applying the caulk, utilize your finger to delicately smooth and flatten the line, eliminating any surplus caulk. To finish, cautiously remove the masking tape. Allow the caulk to dry thoroughly for a period of at least one to two days before exposing it to water or moisture.
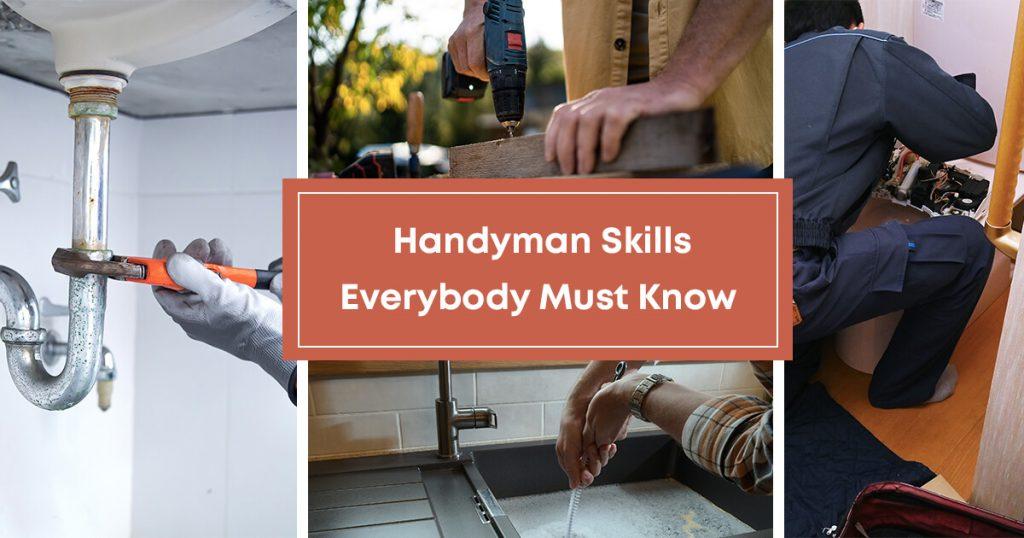
Fix leaks
Each model may have its unique specifications, but the fundamentals remain consistent. Ultimately, the solution typically involves replacing a worn-out or defective washer, O-ring, or stem. The subsequent instructions will assist you in identifying the issue, but it’s crucial to ensure a precise size match when replacing any compromised components.
Begin by shutting off the water supply both at the sink handles and the mainline. The mainline is typically connected to a small valve located on the pipes beneath the sink. Proceed with care as you use a flat-head screwdriver to gently detach the knob handle(s) from its position. Take your time and exercise caution to avoid any damage during the removal process. If it feels too tight, apply a small amount of penetrating oil for lubrication to facilitate easy removal.
Take hold of a wrench and use it to loosen the packing nut, granting you access to identify the stem. From there, carefully extract the stem and conduct a thorough examination, scrutinizing it for any indications of damage. Likewise, inspect the O-ring and washer, as one of these three elements is likely responsible for the problem at hand. Replace any impaired parts accordingly.
Unclog a drain
The available options for resolving the clog may vary depending on its severity. Begin by trying to unclog the drain by employing a blend of steaming water, vinegar, and baking soda. Pour a generous amount of this solution into the drain to dislodge any soft blockages, such as grease or residue. If this method fails to yield results, your next course of action involves using a plunger specifically designed for sinks – you deserve the best, after all. To address the issue, fill the sink with water up to the halfway mark, and proceed to utilize a plunging technique on the sink drain, similar to what you would do with a toilet. Create suction by pumping the rubber section of the plunger vigorously.
Seal pavement cracks
If you’re not residing in an apartment, your realm of responsibility and maintenance may extend to your driveway. Unfortunately, the presence of cracks in concrete and asphalt is an inescapable reality. Neglecting these cracks may lead to the formation of troublesome potholes. Fortunately, the process of repairing them is simple and uncomplicated. Prior to commencing the repair, it is imperative to eliminate any vegetation or debris that has accumulated within the cracks. Use a screwdriver or the tip of a knife to clear the surface, and then employ a garden hose to flush out any deeper materials. Allow the crack to dry thoroughly.
Once the crack is dry, apply crack filler until it aligns with the surrounding surface that requires repair. Allow a minimum of 24 hours for thorough drying. If the crack remains visible after this time, it is advisable to apply a second coat of filler. To ensure the repair sets completely, it is recommended to refrain from walking or driving in the restored area for one to two days. This period allows sufficient time for the material to solidify entirely.
Change your showerhead
To begin the process of removing the old shower head, turn a wrench in a counter-clockwise direction to loosen its notch. Once loose, unscrew the old head by hand. To clean any accumulated scum or residue around the old shower head stem, take a rag soaked in vinegar or a small amount of alcohol and gently scrub the area.
Afterward, acquire several layers of Teflon tape and apply it to the terminal part of the stem pipe, encircling it completely. Employ your fingers to carefully smoothen the tape, guaranteeing a firm and snug fit. Subsequently, manually affix the replacement head by turning it in a clockwise motion onto the pipe. Once properly installed, activate the shower to inspect for any indications of leakage. Should you detect any leaks, cautiously employ a wrench to tighten the new shower head, ensuring a secure and watertight connection. Take caution to tighten gradually, ensuring you do not overtighten.
Replace your toilet seat
Here’s a simple task that can have a significant impact. Start by opening the bolt caps, which are the snap-shut plastic lids located at the back of the toilet seat. Extend your reach and maneuver your hand both around and beneath the toilet seat to locate the securing nut responsible for attaching the seat to the bowl. Employ an adjustable wrench to firmly grasp the nut. While maintaining a grip on the nut, proceed to rotate and unscrew the two bolts holding the seat in place, exercising caution. Lift the old toilet seat with care, ensuring a smooth removal process.
Now, position the new seat in place, ensuring that its anchor bolts align with the two holes on the toilet base. Insert the bolts through the holes, and from underneath, manually screw on the nuts. Take care to center the seat properly. Finally, using a wrench, firmly tighten the two nuts to securely fasten the new toilet seat in place.
Learn Handyman Skills to Grow Your Confidence
Remember, while professional help may sometimes be necessary, having a basic understanding of these basic handyman skills empowers you to take control of your domain. By embracing a do-it-yourself approach, you can save money, gain a sense of accomplishment, and ensure that your personal space is well-maintained.
So, go forth and conquer your domain, armed with these valuable handyman skills. With each task you master, you’ll become more self-sufficient, resourceful, and capable of handling various repairs and maintenance projects that arise in your home. Your domain awaits your skillful touch as you transform it into a well-maintained haven where you can proudly reign supreme.