Thermal paste is a crucial component in keeping your CPU cool by facilitating heat transfer between the CPU and the heatsink. Over time, however, the thermal paste can become dry or contaminated, leading to decreased cooling efficiency. Cleaning off the old thermal paste and reapplying a fresh layer can help maintain optimal thermal conductivity.
Understanding Thermal Paste
Before you start cleaning thermal paste off your CPU, you need to understand thermal paste. Thermal paste is a special material that helps transfer heat away from your computer’s CPU (or GPU) to the cooler. It fills in tiny gaps between the CPU and cooler, which helps heat move away more efficiently. This is important because if your CPU gets too hot, it can damage your computer.
When to Clean Off Thermal Paste
There’s no exact rule for how often you should clean and reapply thermal paste. It depends on things like how often you use your computer and how hot it gets. As a general rule, it’s a good idea to clean and reapply thermal paste every 12 to 24 months or if you notice that your CPU or GPU temperatures are getting higher than usual.
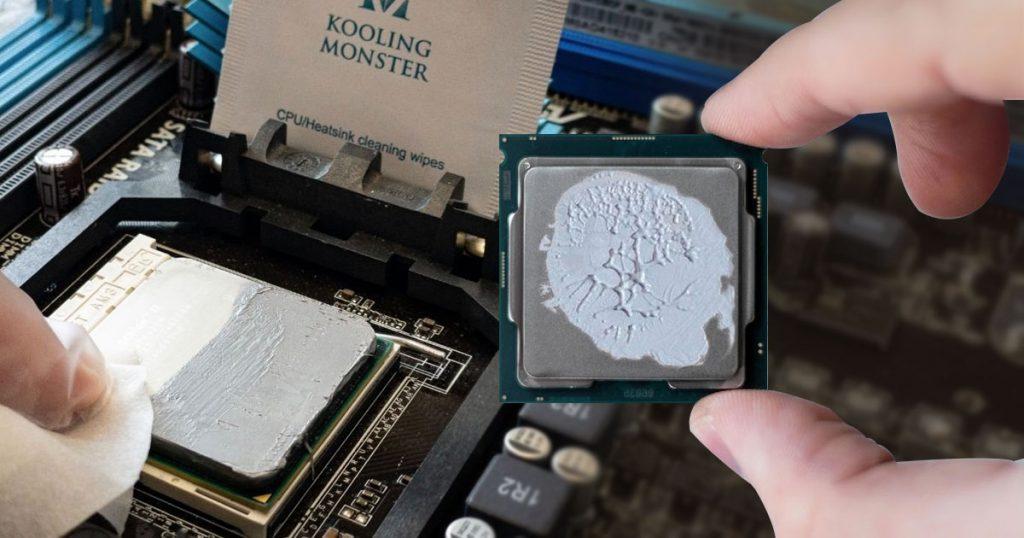
What do you use to clean off thermal paste?
Before you start cleaning off the thermal paste in your CPU, gather these items:
- Isopropyl alcohol (90% or higher)
- Lint-free cloths or coffee filters
- Cotton swabs (optional)
- Thermal paste (for reapplication)
- Work in a clean, well-lit area to avoid dust or debris.
How to clean off thermal paste?
Once your materials are set, you can start cleaning off the thermal paste right away. Here are the steps:
Step 1: Powering Down and Disassembling
Safety first! Turn off your computer and unplug it. For laptops, remove the battery. Then, carefully take apart your computer to reach the CPU (or GPU) and its heatsink. Use the manual or online guides for help.
Step 2: Cleaning the Old Thermal Paste
Gently lift the heatsink off the CPU or GPU. Be careful!
Use a cloth or filter with isopropyl alcohol to remove the old thermal paste from both surfaces. If needed, use a cotton swab with alcohol for stubborn bits. Make sure both surfaces are clean.
Step 3: Preparing for Reapplication
Before you reapply the thermal paste, check for dust or debris on the surfaces and wipe them clean.
If you are wondering how much thermal paste you’ll put on your CPU, apply a small amount to the center of the CPU or GPU and spread it evenly with a flat tool.
Carefully put the heatsink back in place.
Step 4: Reassembling and Testing
Put your computer back together. Turn it on and check the temperatures using a monitoring tool.
If everything is done right, you should see lower temperatures. If not, try cleaning and reapplying the thermal paste again.
Tips and Best Practices When You Clean Thermal Paste Off CPU
For the best results when cleaning off and reapplying thermal paste, follow these tips:
- Use good-quality thermal paste: Choose a well-known brand that’s known for working well and lasting long.
- Don’t spread it too thin: Make sure the paste covers the surface evenly, but don’t spread it too thinly. This can make it less effective.
- Keep things clean: Work in a clean area to avoid dust and dirt getting in the way. Keep the surfaces clean, too.
- Be gentle. Don’t press too hard or use rough materials. Doing so could damage your CPU or GPU.
- Get help if you need it: If you’re not comfortable doing this yourself, it’s okay to ask for help from a professional. They can do it safely for you.
Learn the Effective Ways How to Clean and Reapply Thermal Paste!
Cleaning off and reapplying thermal paste might sound hard, but it’s important to keep your computer running well and avoid overheating. Just follow the steps in this guide and the tips we’ve shared, and you’ll be able to keep your CPU or GPU cool and working great for a long time. Taking care of your computer’s temperature can help it last longer and keep it working smoothly.